13 decembrie 2022

ICOM AH-4 tuning aid with any radio

 Somehow, you end up into an ICOM HF eco-system.

You have an IC-7300 or 7100 or 7000 or anything else; a radio that can do HF and you also have an IC-AH-4 the "wonder ATU" from ICOM.

You mod it to be more modular and portable as I did, ready for field use.

Maybe you want to use some other radios on the same antenna system or you want to go portable with a Xiegu G90 and you said to yourself: "I could put that AH-4 to good work but the ATU will not work with anything but ICOM radios".

Well, you may be wrong!

The AH-4 can and should be used with other radios because it is a small gem! But how?

A small independent control box can be used with other radios to tune various antennas, from wires to loop antennas and this is what I done recently.

It is in a crude form, maybe I will make it with the help of a microcontroller or maybe I will leave like it is now because, it is working well!

What do you need?

-ICOM AT connector;

-One Red and one Green LEDs

-Two PCF817 or similar optocouplers;

-Two 1N4148 or 1N4001 diodes (not mandatory);

-Three resistors between 1.2 KOhm and 2.2 KOhm (these values where tested);

-a temporary SPST push button;

-a small test PCB or any other solution to mechanically fix all together.


The schematic:


How this is working?

Power up the box. The Green LED will lit.

START and KEY have 5V (UP).

Set the radio to 5W in carrier mode (AM, FM, CW) and press PTT or CW Key.

Momentary press the button TUNE. The RED LED will lit.

The START line (from radio to ATU) will go down; the ATU will respond with KEY going down for the tuning cycle (request for carrier). Side note: if you didn't press the PTT or the CW Key before pressing TUNE, now it's the moment to do that!

During the tuning cycle, the AH-4 will request from the radio (which is not connected to the control lines) to transmitt a 5 W carrier. 

Thus the IC-1 LED will lit and the corresponding transistor will keep START line down as long as the tuner need for the tuning cycle. Keep PTT or CW Key pressed on the transmitter.

When the RED LED is going off, the tuning solution is achieved.

Note: there are situations when the tuner will not find a solution for the antenna; the RED LED will go off and will lit again, the tuner will start a second sequence then will go in bypass mode.

I suggest using a small SWR meter between the radio and the ATU or watching the built in SWR meter to be sure a tuning solution was aquired.

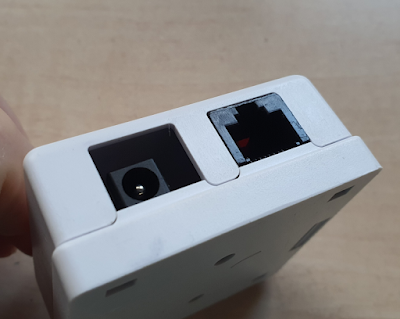
This is my version:


The LDO is not used, it is for "further developments and upgrade"!
Yes, I know, it's ugly! I don't care about at this stage. 
It is temporary and it's working. 
The next version will be with a nice MCU, WiFi and Bluetooth controll and probably with RF sensing for auto-tuning!

Kidding but why not trying something like that? 

Are you a brave ham?

73 de Adrian YO3HJV


07 decembrie 2022

Some considerations about voltage readout on radios

 From time to time, in discussion groups some fellow hams start worring about the voltage drop on the radio readout.

This is from a Xiegu G90 group:

> However, the 0.9 voltage difference was still there. I am fairly sure now the

> difference is due either to inaccuracy of G90 volt meter. (I do know it reads

> 0.2 volts low in receiver mode) or there is something internal to the G90

> causing the drop


I think some theory must be exposed to help users to understand what it is about the voltage readings in these radios (and others as well).

The voltage is measured with an ADC (Analog to Digital Converter) which "translates" variable voltages into digital variables.

One important thing to understand is "resolution" which is the lenght of the number that store the analog voltage value.

In our case, the ADC input of STM32F4xx can operate in 6-bit, 8-bit, 10-bit, and 12-bit configurable resolution.

Another important value is the maximum voltage that can be applied to the ADC input, which, in our case is 3V3.

Based on the datasheet of the uC, we can safely assume that the voltage is measured in 8-bit resolution (best resolution without some tricks that involve supplemental processor cycles which are precious because they are time-consumer in a uC which also have to do DSP things), 

Resolution = ( Operating voltage of ADC ) / 2^(number of bits ADC).

Therefore, in our case:

Resolution = 3.3V/2^8 = 3.3/255 =12 mV.

This are the "steps" in which the voltage is measured in 8 bit resolution. 

BUT! There is a big caveat here...

We cannot measure with this resolution the input voltage as is much over the 3.3V after which the input of the ADC will be destroyed!

So we put in line a voltage divider!


The divider will have to accept at least 20V (because the radio accepts input as much as 17V in normal operation.

Let's find out, what is the voltage divider ratio in our radio...

If we look on the schematic,  Xiegu G90, the voltage divider is made with R63B and R67B 3.3KOhm and 470 Ohm respectively, which gave a ratio of 1:8 which means the resolution of the internal voltmeter is 0.096 (roughly 100mV) and the maximum voltage is 26.4 V!


So, any variation in the input voltage of more than 101 mV will be shown as a ... surprise, 200mV or 0.2V!

Simply said, the radio cannot show variations less than 0.2V!

As for the big variations when transmitting, again, from the schematic we can observe that the whole PARF components are tied to +13V.

The voltage tap used to measure the voltage is well beyond some components that will present a certain resistivity:

-power cord;

-fuse receptacle;

-RFI choke with both ground and positive leads;

-two MOSF-FETs used for reverse polarity protection and PowerON.

So, a 0.2-0.5 Ohm is a decent value for all of these and all of the above could explain the voltage swing measured by the internal DMM.

I think this will give a reason to enjoy the radio without worring about that voltage readout!

Cheers, 

Adrian

Most viewed posts in last 30 days