Let me present a project to both show off and because it might be useful to others, a GNSS disciplined CTCSSDCS and DTMF generator.

Why? How?
This is the "bottom of the well" (from "out of the frying pan into the fire") because I initially started with a repeater controller (also ESP32 based), to which I wanted to add CTCSS/DCS/DTMF detection and generation (DSP based over ESP32 - still work in progress).
After creating the detector (based on DSP on the ESP32 dual-core platform), I found that I had no means at hand to verify the accuracy of the detection!

So, after a brainstorming session with myself, the solution emerged from smoke and beer - a GPS-disciplined oscillator. Twenty years ago, this would have been difficult to implement, requiring far too much effort on the hardware side and at a prohibitive cost.
Hey, but now we have very capable development boards, with the very board I was developing the repeater on sitting on my desk. The same one I was developing the decoder on...
Well, I thought, why not a signal generator disciplined with a GNSS PPS signal?
Signal generation, sinusoidal (well, approximately), would fall to one of the two DACs available on the ESP32 platform.

I consulted with ChatGPT to check if the ESP32
performance allows implementing such a generator and if it's possible to use a
WEB interface for control (GUI) to get rid of HW accessories like encoders,
buttons, display, etc...

The "debates" were interesting and helped me crystallize the development direction of the project. It's really good to have "matches" with this artificial intelligence, it can help you put your thoughts in order when you go off track!
Getting to Work!
However, I shifted the difficulties from hardware to software. During development, I encountered a phenomenon similar to the wave-particle duality, namely, "observing" the ESP32 software oscillator introduced completely random and impossible-to-compensate errors.
The most sensitive processing is made in ISR functions and observing what was happening inside them was sometimes pretty delicate. In other points, introducing Serial Debugging lines delayed the execution of some other delicate functions.
Signal generation is a time-based thing and calculations of the time in the ISR was simply impossible, delaying the execution and producing malformed wave-forms. Calculations made outside were simply, lacked on precision even using dinamically calculated correction factor.
For those understanding this aspect, the solution was seemingly simple but drained my energy for about two days (summer days, until evening).

Instead of time-difference-based measurements, the timers were based on cycle counting and these were used as references. For an engineer probably this was the right choise from the beginning but for me, as a full-time lawyer, this was a real milestone.
I'll close this overly-extended technical parenthesis.
Similarly, I won't go into boring details about disciplining the software DDS
based on the pulse received from the GPS receiver, but I'll present a few
aspects, as I'm proud of them!
The "disciplining" algorithm works like this: the timer that forms the basis of signal generation provides one pulse per cycle; at each pulse received from the GNSS receiver, the theoretically calculated value is compared with the practical value. From the difference, a correction factor is calculated which is then applied.
It seems simple, but in this algorithm, there are a series of self-adaptive functions that ensure that changes are progressive, applied at zero crossings, and other such interesting tricks, discovered through repeated wall-hitting during the project...
The Nail in the Shoe
I spent a healthy number of hours on a series of problems whose cause I couldn't identify and which kept the process stalled.
The paradox: compilation ran without any problem, but the functionality of the code was non-existent in certain absolutely necessary processes!
An INTerrupt refused to trigger... Just like that, as stubborn spoiled kid! I spent two days trying to understand what was happening and was even thinking I was approaching the third day (when if the problem doesn't solve itself, projects must be abandoned)!
I already write about this stupid moment in my life...After reverting to an "outdated" version, I overcame the first major hurdle.
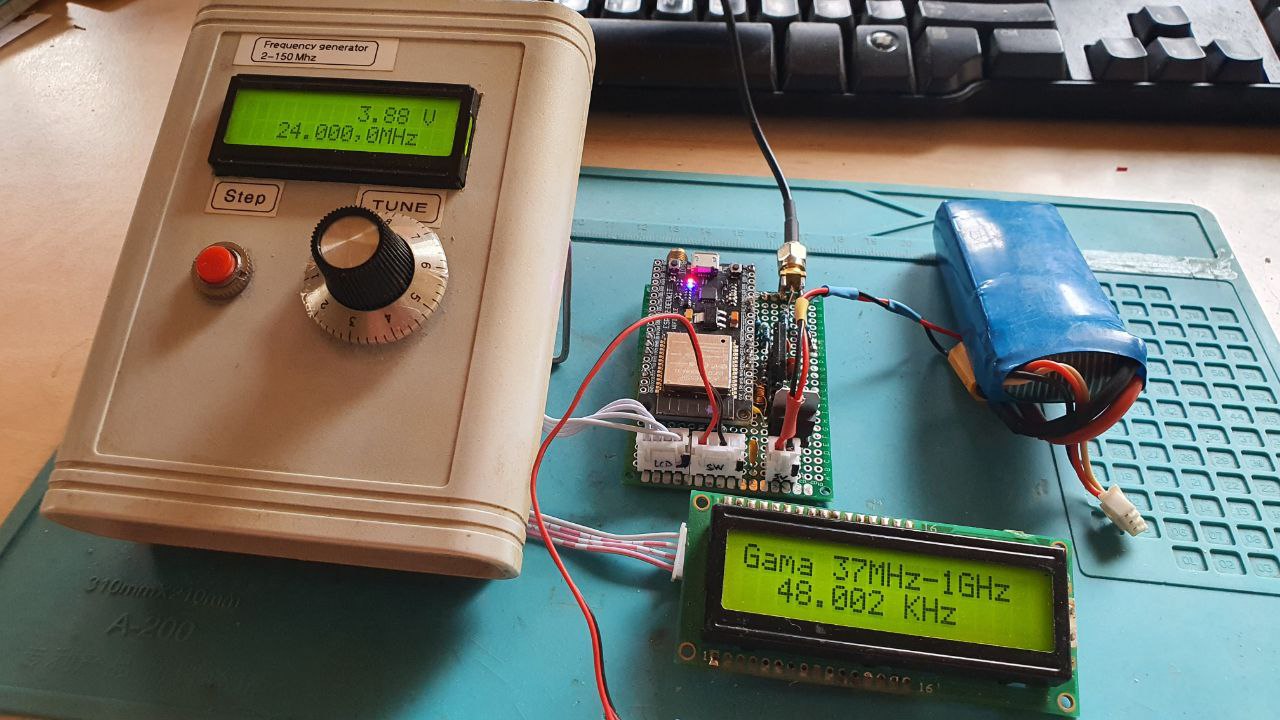
Verification
It wasn't as simple as it seems, but at some point, the signals started to be visible on the oscilloscope, and another question emerged from the fog and beer: How the heck do I objectively verify what comes out of the DACs?

The solution, again elegant (I think), was comparing a derived reference (brutally square) from the GPS signal but with high frequency (5KHz) with the signals generated by the DAC and with the signal from the GPS using a multichannel oscilloscope.
And the result... mmmm, the result was exceptional and encouraging, with deviations beyond the observation limit, within the signal noise limits!
The heat kept me away from the journey to the laboratory where I have more sophisticated equipment, but for something done "on the table," I'm more than satisfied.
DCS Signal:


Web Interface
The eye must also be satisfied somehow, and here I heavily involved Artificial Intelligence because, on one hand, I don't master the domain, and on the other hand, the complexity of the graphical interface (GUI) and the Front-end (the code executed in the browser, which communicates with the Back-end - the actual program in the ESP32) requires coordinated interventions in many parts of code. Exactly what AI is good for! Except that sometimes it hallucinates!
Seriously, AI, I discovered, hallucinates, which is why it often ruined what I had laboriously built. An opportunity for it to learn some genuine Romanian curses, the kind Păcală would say to make the Devil's eyes pop out of his head!
In the end, from the confrontation, I emerged a little more knowledgeable in these aspects and at least can give the LLM (Large Language Model - AI that is) very precise instructions, which keep it awake and from which I can get what I want!
I tried to make the interface as simple to use as possible, like a laboratory device - which is what this project actually is - but also easy to use for anyone who wants to transform an ESP32 into a CTCSS/DCS/DTMF signal source for various projects.
The usage is intuitive, and there may still be some bugs; "the master's eye fattens the calf," so it's hard for me to discover them myself, it remains for users to shout out what's not OK here and there.
In principle, the user interface reflects the internal architecture:

It's divided into logically organized sections that provide control and feedback... what more can I tell you?
It also has an interface for uploading files necessary for the graphical interface; anyone who wants can make their own interface!

You have no idea how much I struggled to make batch file uploading work! It was murder to keep uploading them one by one!
A Few Words About Performance:
- Accuracy in generating CTCSS and DCS signals, better than 1% (I'd say better than 0.5%) but I don't want to boast too much!
- I also attached a tone generator with frequency between 40 Hz and 1.2 KHz, but above 900 Hz the signal begins to degrade due to digital-to-analog converter limitations.
- DAC1 and DAC2 signal level:
* max 2.35 Vpp.
* med: 1.6 Vpp.
* min: 850 mVpp.
- 0-3V logic signal outputs for various signals, also disciplined with GNSS.

Laboratory Integration
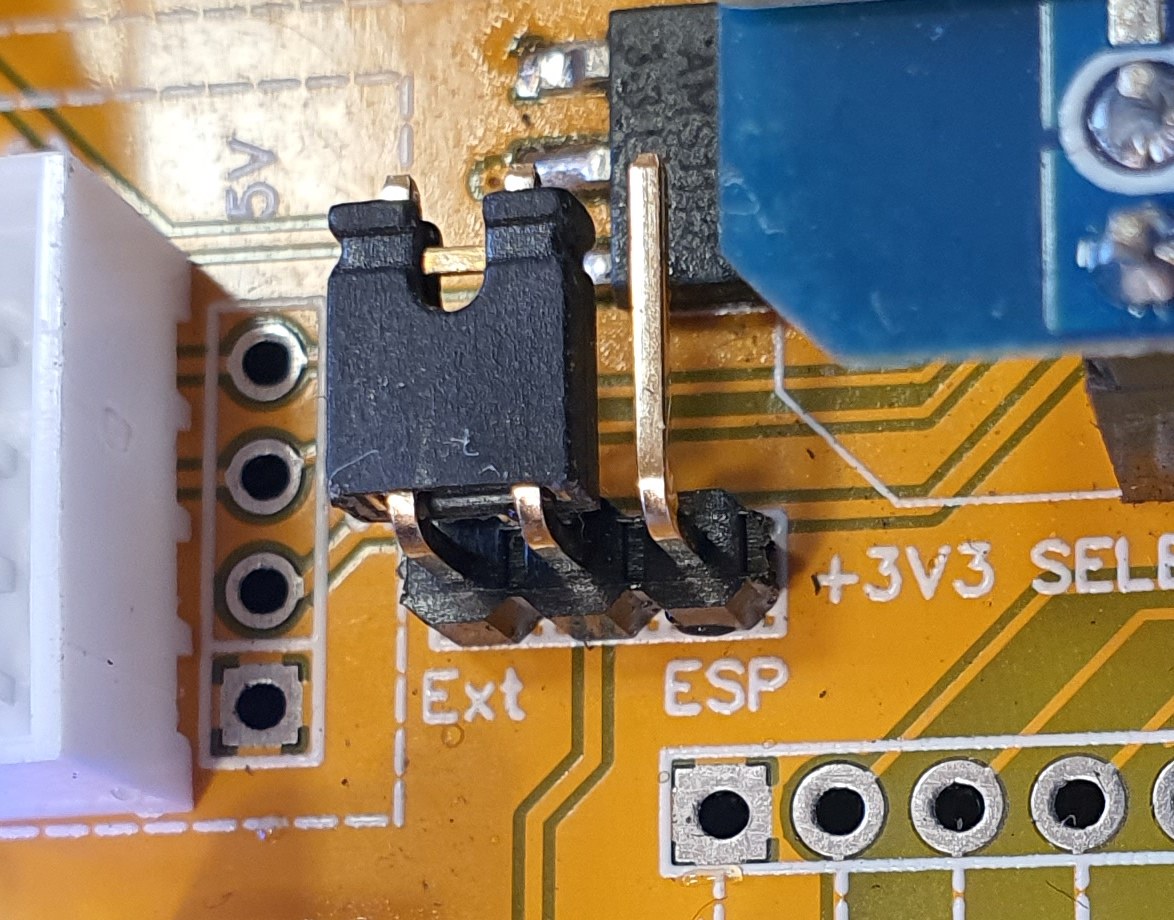
For the project to become a laboratory equipment, it's useful to connect a GNSS module that has visibility to the sky. The code doesn't use any other information transmitted by this module except PPS, so a connector with 3 wires can do the job just fine.
Even in the absence of the GNSS receiver, the precision is quite high, demonstrated by observing the correction factor applied following the 1PPS signal; this was a surprise because I expected larger errors but it seems that the architecture and non-blocking code it helps a lot.
Regarding the signal in the analog domain, i.e., the outputs, minimal filtering on each of the two outputs could improve signal quality by reducing possible artifacts produced by digital generation. Although there is a digital "volume" on each of the two DACs, it would be useful to have potentiometers for fine adjustment of the level to the DUT (the equipment benefiting from the signal).
A low-pass filter for frequencies below 1 KHz for DAC 1 and one with a limit at 2 KHz for DAC 2 would be welcome; in their absence, at least a network of 1 Kohm and a capacitor of about 1 nF to ground could reduce artifacts at the cost of some loss from the useful signal.
The generator can be integrated into the existing WiFi network or can generate its own Access Point.
See? Have you forgotten what it started from?
Yes, I forgot too; I needed something that would very precisely generate a CTCSS tone...
I'll leave you a link to the GitHub page of theproject where you can find it already compiled, so you don't have to bother with the necessary libraries:

OK, so the project was completed at the cost of a few sleepless nights.
While searching for a board to mount the potentiometers to unify the two audio channels, I found at the bottom of one of the many boxes that accumulate with "you might need it someday" a board with an FX365 circuit, CTCSS Decoder/Encoder. Life has mysterious ways of pulling the rug out from under you!

Oh, well... Sometimes life sucks!
Anyway, for me was a real technical journey into some unknown territories and I am really happy I could see it working at the end. After all, we are hams for this kind of exploration into "hic sunt leones", uncharted areas of technology...
Feel free to test and drop a comment if you liked or not and if you have suggestions but keep in mind this is a tool for a small lab with the main scope of generating a precise frequency to help the tests of a CTCSS/DCS/DTMF decoder for a ham radio repeater... :-)
73 from Adrian, YO3HJV


.jpg)


